
Setting up a menu button that will allow the remote printer to be switched "on the fly" per order.
The menu items will go to their normally designated printer by default unless you use the toggle button before tendering or touching "done" on the order.
- In Windows, you will need to install both printers that will be the toggle choices for the remote printing. In our example from the printer names are Bar1 and Bar2. See the Winprint.png below.

- In MicroSale, set up both printers as remotes. See Bar1.png and Bar2.png below.


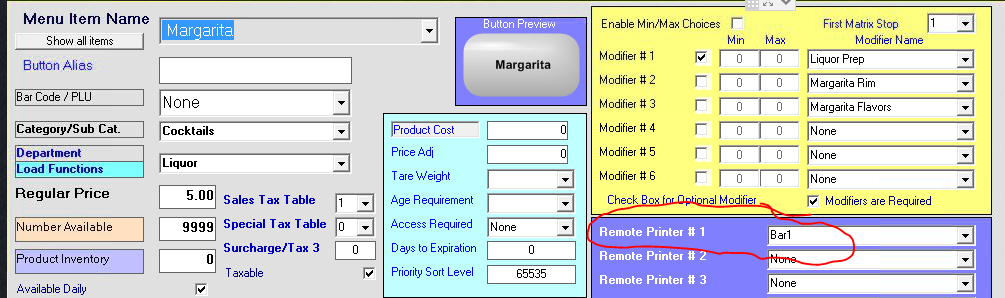
- In this example, the menu items themselves will be assigned to the Bar1 printer as the default. See menuitem.png below.
- Next, create a menu itemed named the EXACT name of the printer. You can use button alias field to provide a better description for the button. i.e. The menu item name is called "Bar2" but the button alias says "Send to Tiki Bar". See functionbutton.png below.
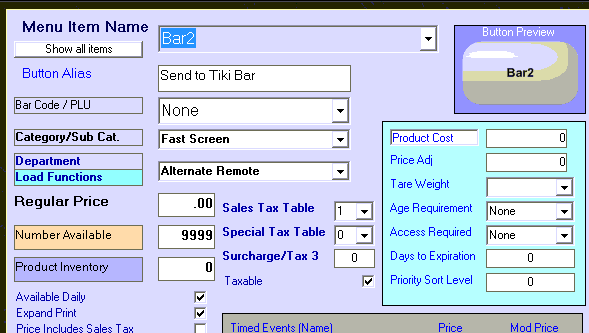
- Create the menu item in whatever category that you desire it to be in. Be sure to assign the menu item to the department "Alternate Remote". You can also assign this button to multiple screens by selecting "All Categories" on the button layout screen. Double click the Bar2 text (select YES to make it a button, add it to the button and drag it to the screen).
- After the menu item is created you will need to add the functions.ini to the MicroSale directory (program files > Micro$ale > Ini Files) on each register in which you wish to use this toggle. The attached functions.ini file shows how it needs to be setup. See below for an example of the .ini file as well. The other remote printer name (Bar1) would be put into the “Alternate Remote 1” field. THIS FUNCTION WILL NOT WORK WITHOUT THE INI.
[Printing Options]
Alternate Remote 1=Bar1
Alternate Remote 2=