|
1. Select “Goto Modifier Screen”
|
|
|
|
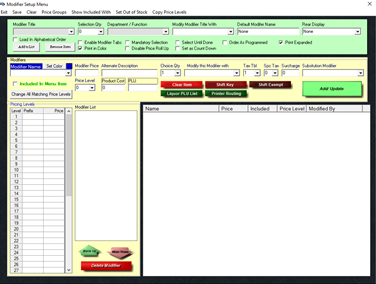
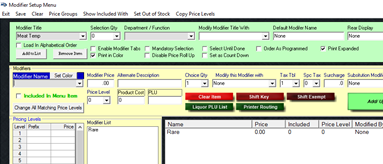
2. Create a Modifier Title
A modifier title is used to group similar modifier names together. Each Modifier Title will contain a list of one or more choices. |
|
|
|
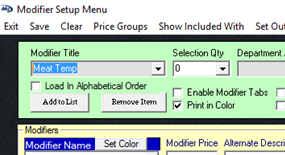
3. Type in a title appropriate for this group of modifier names – such as Meat Temp
|
|
|
|
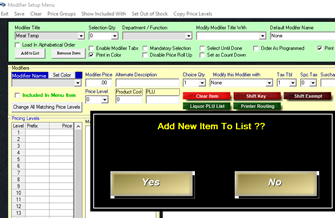
4. Click in the box under Modifier Name (Select Yes when it prompts “Add New Item to List”)
|
|
|
|
5. Type in a modifier name – such as Rare
6. Select Add/Update, assuming you do not want a price associated with this modifier name.
You should see the modifier name you just added in the white box.
|
|
|
|
Continue adding modifier names until your list is complete – you can also save the modifier group and make changes later.
|
|
|
|
Before saving, think about the type of modifier group you created and answer the following questions –
· Do I want to force the cashier/server to select something on this screen? – if Yes, select Mandatory Selection. · Do I want to allow the cashier/server to select as many modifier names as they want? If Yes, select Select Until Done. (If you want the screen to exit after one choice, leave the Select Until Done option unchecked.)
|
|
|
|
7. Select Save |
|
|
|
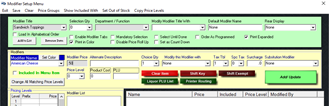
While in the Modifier Setup screen, create a generic modifier group that will be used for all of your sandwiches or similar style items. |
||
|
1. Type in Modifier Title – such as Sandwich Toppings. |
|
|
|
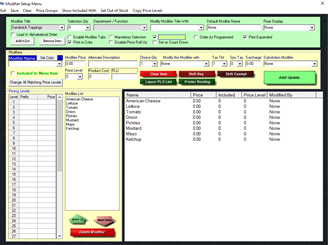
2. Type in a Modifier Name, such as American Cheese. 3. Type in a Modifier Price if the modifier name should have an upcharge. 4. Select Add/Update – you should now see American Cheese at .50 in the white box. |
|
|
|
Continue to add modifier names until your list is completed. |
|
|
|
When completed, decide if the group should be mandatory (where the cashier/server must select a modifier name before exiting the screen) and/or if the cashier/server can select as many toppings as they want before exiting the screen.
5. With the toppings group, enable “Select Until Done” and do not make the group mandatory.
|
|
|
|
6. Save and Exit. |
||
|
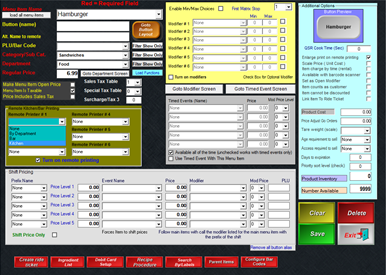
Now that you have a modifier group built, you should be back on the screen with your menu item that you just created. If you do not see an item on the screen, press the dropdown and pull up an item.
|
|
|
|
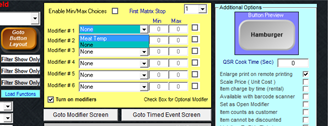
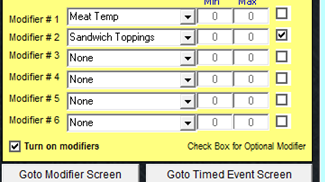
1. Select the option Turn on Modifiers |
|
|
|
2. Next to Modifier #1, select the Modifier Title that is appropriate for this menu item. |
|
|
|
If you want this modifier group to prompt as soon as the cashier/server selects this menu item, leave the Optional Modifier box unchecked.
Hint: You only want to prompt for modifier groups that are important to appear with the menu item such as meat temps, mandatory sides, other additions that are important for the kitchen to know, or additions that incur an extra cost.
If the Optional Modifier box is checked, it means that the modifier group will only show up if the cashier or server uses the Modify Item function button on the Order Screen.
|
|
|
|
3. Select Save when you are done. |
|
|
How to create modifiers