
ID Screen > Managers Menu > Menu Maintenance > Menu Modifiers
- Create a Modifier Title
- If this group can be modified by pizza half, select the dropdown under "Department / Function" and select Select 1/2.
- Tick the checkbox for "Select Until Done". This will allow the user to add/delete as many toppings as necessary until selecting "Done" on the screen.
- Type in a Modifier Name such as Pineapple, leave the regular modifier price at 0.00 Think about the shift levels that were setup in the above section. If you created shift levels for pizza, you may have a SM size (using Price Level 1) and MD size (using Price Level 2).
- Type in the appropriate price that correlates with each size. In level 1 of the Pricing Levels area, representing the SM size, put the price in the first field. If there is no price, leave it at 0.00.
- Continue with the prices for level two and then select Add/Update. (Note: unless you need Pineapple to say SM Pineapple or MD Pineapple, you can leave the prefix field blank).
-
- You do NOT have to anything in the Prefix field. This area is typically used for specific above store inventory programs that helps to better account for the size of the topping that is being sold

- When you are done with your list of modifiers, select Save and Exit
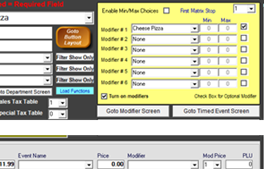
- Go to the Menu Items and Pricing screen and pull up your Cheese Pizza pizza menu item (if you do not have one in the list, go back to the previous section)
- Add your menu Modifier Title in the top right section of the Menu Items and Pricing Screen
- Tick the checkbox to only have this modifier group appear when called upon (uses the function Modify Item) or keep the checkbox unticked to make the modifier group immediately prompt after the item is selected on the order screen
- Since you have now altered your menu item, select Save to save your new changes.
Continue to section > Adding a button