
Stop! PLEASE MAKE SURE YOU HAVE COMPLETED THE PC SETUP GUIDE AND WINDOWS 7 or 10 SETUP GUIDE BEFORE COMPLETING THIS STEP.
![]() Please Note! PLEASE MAKE SURE YOU ORDER THE SOFTWARE LICENSE BEFORE TRYING TO ACTIVATE SOFTWARE.
Please Note! PLEASE MAKE SURE YOU ORDER THE SOFTWARE LICENSE BEFORE TRYING TO ACTIVATE SOFTWARE.
ALL SOFTWARE MUST HAVE A VALID LICENSE FILE. You will place your software order under “New Order” on the Dealer Portal. If you are a restaurant owner, please contact your dealer to order the software.
The purpose of this document is to walk through the process of installing Version 9 of MicroSale. Prior to this document you should have read and followed our PC Setup Guide and Windows 7 Setup Guide (if applicable).
If you have any questions or concerns while following through this document, please contact Technical Support at 813-681-1875 or support@microsale.net
Installing Version 9 and Upgrading
Each step below must be performed on ALL terminals and you must have an internet connection to each terminal.
- Copy the Version 9 Install/Upgrade file (uses same file) from the FTP site to each terminal.
- Run the Version 9 Install file.
- If applicable, run the SQL database upgrade utility in the Micro$ale folder.
- Copy in new Version 9 license file, and if applicable, update the M$CFG.ini.
- Launch MicroSale.
Notice that near the bottom right-side of the screen “Not Activated” will display.
Configuring a Register Number and Messages in MicroSale in Version 9
When you first run the upgrade you will receive the following messages:
License Not Activated…
Please Activate License
Please Save Register Options - This message flashes quickly and does not require an OK
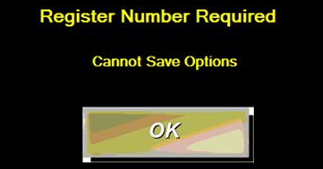
Register Number Required
Cannot Save Options
Activating MicroSale Version 9
The following instructions will walk you through activating Version 9 and explain the various messages you will receive during this process.
Go to Managers Menu > Register Setup > Activate License/Deactivate
- Select Activate POS Terminal License
- Select OK
- Restart MicroSale
- Note: You may receive a message stating “No IP” which means you have not put the V9 license file into the Micro$ale directory. Put this file into the folder and try again.
- A message will prompt stating: “No Backup Configuration Found. Please Create Backup Config Files”
- Select “Yes” to proceed with configuring the backup
- The “System Configuration” page will launch
- Select “Remember Terminal Configuration” button
- Select “OK” to the “Exporting the Registry Key Complete” message that appears.
- While within the System Configuration screen, select “Edit Order Screen Buttons” and then select “Restore Default”.
- Select Save
Confirming Correct Configuration in Version 9
- Verify / Correct: Local Pathing / Name / Remotes / File Transfer / System Paths / Credit Card Setup / Gift Card Setup.
- Go to Register Options and verify all options.
- We recommend starting with the “Default Selections” buttons, and then tweaking the options for the desired functionality. Verify that every custom Register Option is selected from its appropriate range.
- Verify all Printer Settings and ESC Codes.
- In Register Setup> Misc Setup-Terminal Groups, Etc. > Select “Edit Order Screen Buttons”
- Configure the function buttons as desired and then select Save.
- Compact the databases on each terminal.
Managers Menu > Register Setup > Misc Setup-Terminal Groups Etc. > Select “Select Main Data Sets” > Select “Compact All Selected”
- Fully Test System: Audits / Sales / Voids / Receipt and Remote printer(s) from each terminal / Credit Card Charge / Tip / Return / Close Audits / Daily Closeout / Settle Batch / Weekly Closeout / Time Clock functions / Time Clock reports / Emailing Reports/ etc.
- Make a new backup of each Micro$ale directory after testing is complete.
----------------------------
Additional Notes:
While optional, it is also a good idea to perform the following:
- Re-register the “FoodCostSync.dll” and “GeneralLib.dll” using RegAsm.exe within Windows
How to do register FoodCostSync.dll and GeneralLib.dll files:
- Go to Start
- Run
- Select “Browse”
- Go to C > Windows > Microsoft .NET> Framework > v2.0.50727 > Select “RegAsm.exe” > Select “Open”
- The pathing for this file is now inserted into the Run window
- Browse to your MicroSale folder and locate the file you need to re-register and drag it into the same field right after the “RegAsm.exe” pathing.
- Select OK
- A black-colored window will appear and disappear quickly (There is no “Successful” message)
- Repeat step 5-6 for each file you need to register