
In some restaurant and bar scenarios you may need to configure the system to charge and track three different tax types. We will walk through an example below where the system will be configured for a Food, Liquor, and Beer tax. It is important to also configure the menu item(s) and discount(s) to work properly with the associated taxes.
Sales Tax Menu
Go to Managers Menu > Register Setup > Sales Tax Menu
The first two rows within the blue tax section will need two tax rates. It is suggested that you change the name from “Sales Tax” to a unique identifier as this will be reflected on your reports.
In our example, we have configured a “Food Tax” and a “Liquor Tax”. Within the bottom section, we have added a “Beer Tax”.
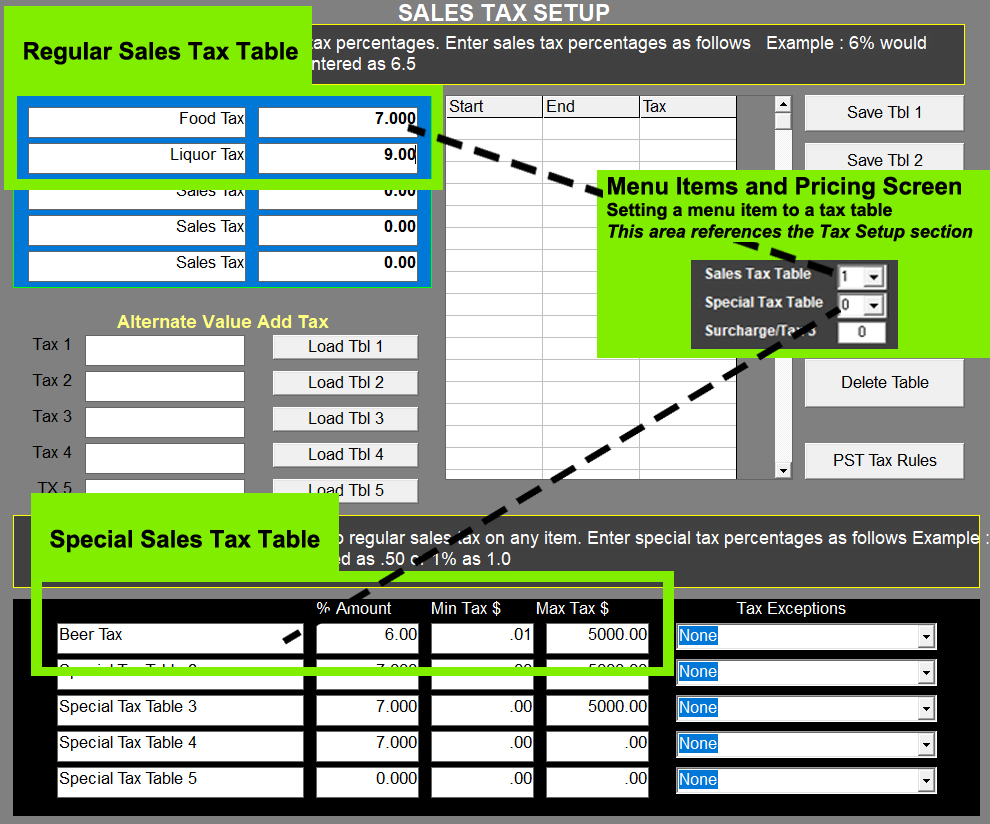
Special Tax Setup
- Go to the Managers Menu > Register Setup > Sales Tax Menu
- The bottom section (shown in black) is the area in which you can configure a separate Alcohol/Liquor tax
- The following information will need to be entered:
Notes:
- You can change the name of the Special Tax to anything within a specific character limit
- The % Amount is the tax rate for the Alcohol/Liquor Tax
- Define the smallest amount on which tax must be collected. Set to 0.01 for no minimum.
- Define the largest amount on which tax must be collected. Set to 9999.99 for no maximum.
- The tax exemption area is used when specific order types should be exempt from taxes (such as To Go, Delivery, etc. if you do not need this, keep it at "None" or "Off".
Menu Item Tax Setup
Below are a few examples of how you could configure different menu item tax rates, assuming each menu item does not need two tax rates set per item.
Go to Managers Menu > Menu Maintenance > Menu Items and Pricing
| Food Item | |
| Sales Tax Table | 1 |
| Special Tax Table | 0 (0 means the table is not used) |
| Liquor Item | |
| Sales Tax Table | 2 |
| Special Tax Table | 0 |
| Beer Item | |
| Sales Tax Table | 0 |
| Special Tax Table | 1 |